Showing posts with label Make it Monday. Show all posts

Monday, July 30, 2012

The Reason I Don't Have My Make It Monday Post Finished...

is because of this. 

It's 10:30 and she's now doing this.   Still not sleeping but it's better than screaming.  I wish Daddy was home tonight :(

Hope the sleep Gods are kind to me tonight.  :)

On the plus side (or the minus), the scale is back on the downward spiral.  Buh-bye fat clothes.  Hello fit and trim Mommy!  (I refuse to say bikini- because with the way my stomach looks, I don't know if I'll wear one every again without some special man-made intervention).

Nighty night (I hope!) 

But soon- you will see my Make it Monday all finished- it has something to do with this

Sunday, July 8, 2012

Make It Monday- Canvas Photo

Make It Monday- DIY Photo Canvas
visit Ashley at the Pollock Potluck for her Make It Monday segment! 


So, I was intrigued by THIS Pinterest post.  I LOVE canvas photos, but I REFUSE to pay an arm and a leg, when I can get a great print, throw it in a frame and save myself an easy $70.  I love photography, but I cannot spend that much money on one photo.  Anyway, when I saw this, I figured it was worth a try.  The worst I could manage would be ruining a $2.00 print from Walmart and a canvas... what the heck? So, here we go.... I forgot to take a BEFORE picture of all my supplies, but you get the point... Mod Podge.  LOVE IT, a photo canvas, some acrylic paint and a photo.  My ORIGINAL plan was to use the same size photo as the canvas, but because I apparently can't read directions, I bought a larger canvas.  I didn't realize this until I painted it black.  I promise I follow directions better than my students... PROMISE.  

Anyway- after I painted it black, I added the photo, sealed with Mod Podge (did I tell you I love Mod Podge?) and waited (impatiently) for it to dry.....

Yes- standing here waiting...

Thought since I'm waiting I should include a shot with MOD PODGE!

When it dried with coat number 1, it looked pretty good, but the sharp contrast of the corners of the photo and the black border didn't do it for me.  A quick review of another DIY blogger on Pinterest suggested sponge painting the edges dark brown or black to give it a fade (I don't know if that's what it's really called, but I'm calling it a fade).  

Final Product:  LOVE!  
Yes- that's me- with my HUGE biceps... I wish my husband didn't have lens darkening glasses... he looks like a creepy 40 something man.  I promise he's not. 

Saturday, July 7, 2012

Make It Monday (on a Saturday...)


Okay- give me a break.  It was the fourth.  I was being lazy at the beach and I forgot to post!  But I did really do my Make It Monday!  Anyway... I decided to do this and this for my post.  I figured even though they are two separate projects, I did them on the same day, and they are similar, so it should only count for one!  

So, I went to Michael's and they were having a sale.  Love when that happens and I haven't planned it!  Anyway, I picked up some shadow boxes.  I still wasn't really sure how I was going to decorate them.  I'm creative, but I don't really have the artistic follow-through.  So- I decided to buy some of the foam letters.  They're pre-shaped, different colors and if I messed up, I could peel them off and throw them away!  
Shadow Boxes and Kid Stuff (right from the shoeboxes where they were stored!)


Then, I selected the letter colors that I needed and measured how to best present them in both boxes (this took WAYYYY longer than expected!)
Looks like they letters are getting bigger- but they're not- I was trying to take a picture with a baby on my hip!


Then, I placed all of the things out before gluing and pinning.  

I still needed to pick up photos from Wal Mart, so they get added at the end!


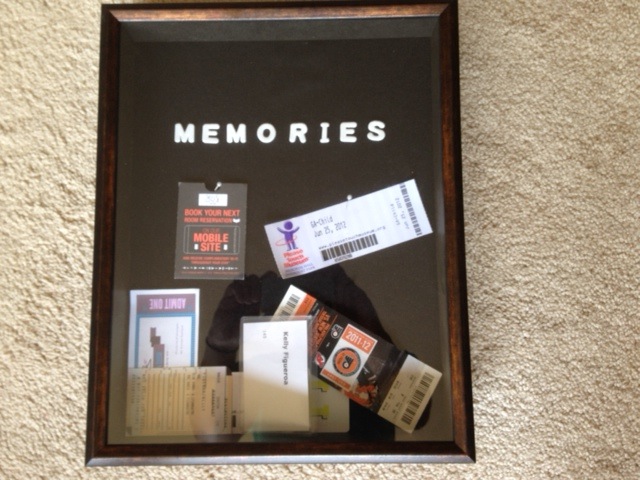
 Final product was pretty impressive, especially for my not so artistic self!   When I finished these, I was inspired to do the memories box.  I don't scrapbook, so I always feel bad throwing away momentos from games, shows, museums, etc.  This is a nice way to collect them.  I think I'll try to fill a box each year.  (Who knows if I'll really be able to keep up with that!)

This was the finished product:
Add stick on letters- and you're done!

Monday, June 25, 2012

Make It Monday!


This week, I decided to remove the wax from a cool jar candle.  But... I didn't take a picture of the candle before. This is what the candle look liked before.
Like the greenish candle in the front!


I liked the jar, but any other time, I would have thrown it in the recycle bin because it has junk in it!  NOW- I know how to fix it!  This pin may be the saving grace of my bathroom!  :)   So- I started cleaning it out (and even though I have an iPhone- I failed  to take pictures!)- and here is the finished product:
Finished product with cotton balls!  


Now- I just want to go buy more candles so I can re-purpose then when I'm finished!  Don't forget to check out Ashley's Make It Monday Post!!!

Tuesday, June 19, 2012

Make it Monday (on Tuesday!)


I've decided to team up with Ashley at the Pollock Potluck and do a Make it Monday post!
I didn't want to spend a lot of money on Father's Day, because we both get a lot of the things that we want- but I wanted to make it memorable.  Our kids are really the reason we get to celebrate these special days, so I wanted to give Eric a gift from the kids.  So- with letters painted by Mackenzie- and a photo session at the park, here's what we came up with:
I'm happy with how it turned out.  It started with these photos:


I tried to get one with the letters spelled out- but Mason was DONE.  So- this was the best we had:


Our Father's Day was nice.  Eric has to work on the weekends- so we didn't get to see him all day, but we went out to dinner with both grandparents:


Mason getting ready to go!

With Mimi and Poppy!

With Lita and Lito!

Family shot!


Diva!